The Passionate Pursuit of Delight

Ingredient: butter

Everything Pretzel Bites

Everything Pretzel Bites-1

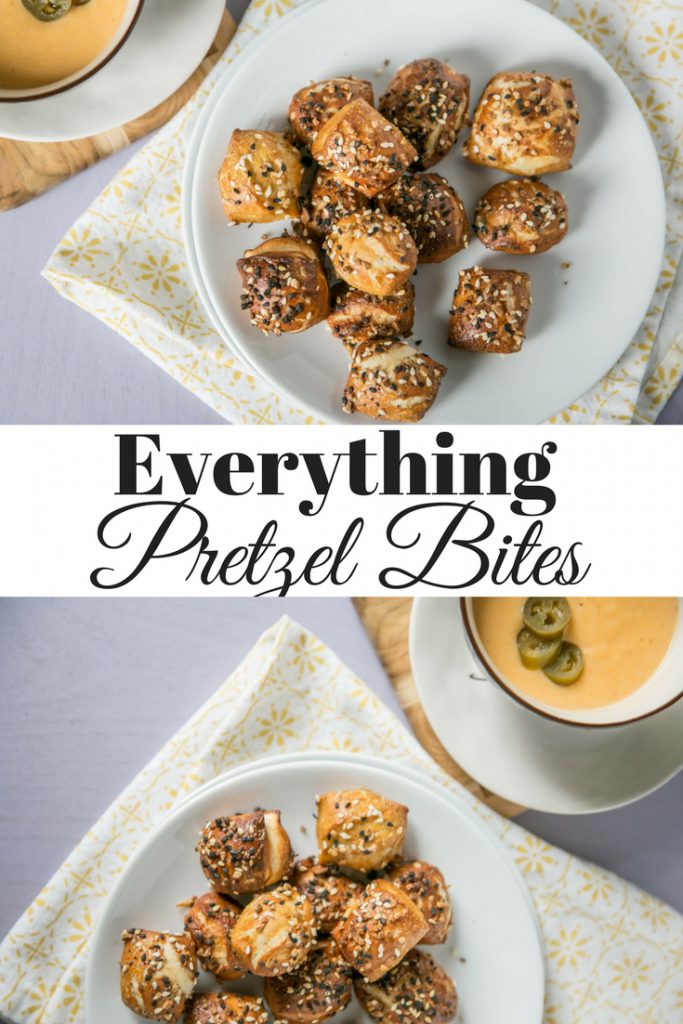
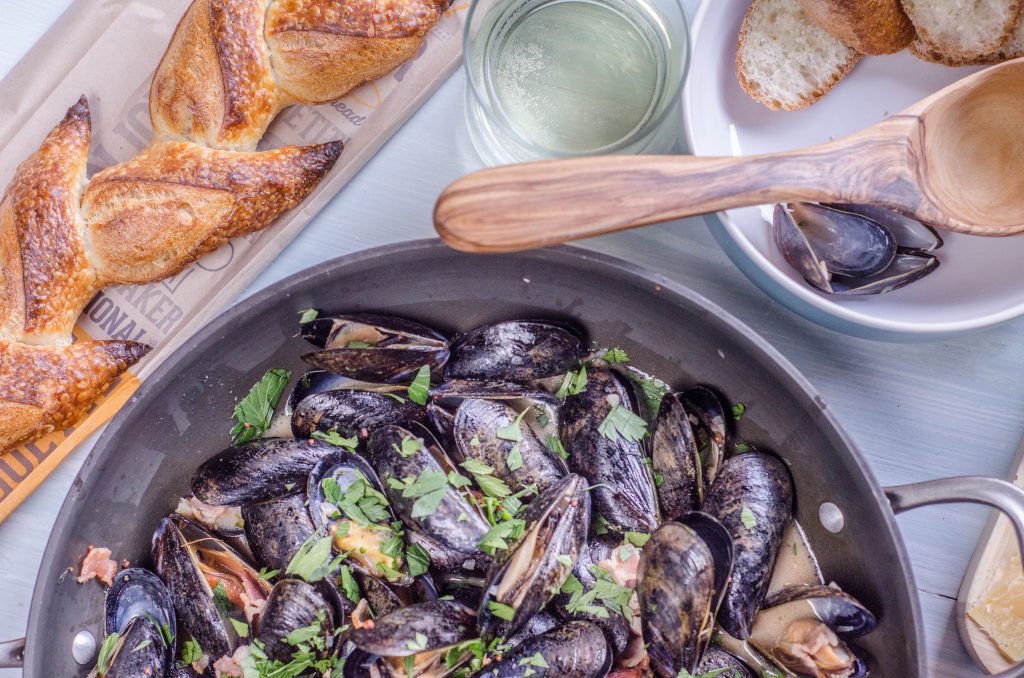
I don’t often make bagels at home but I do make pretzel bites which are small mouthfuls of soft pretzel deliciousness. Perhaps it’s because I am indecisive or that I cannot commit to just one bagel topping but everything bagels have always been my flavor of choice.

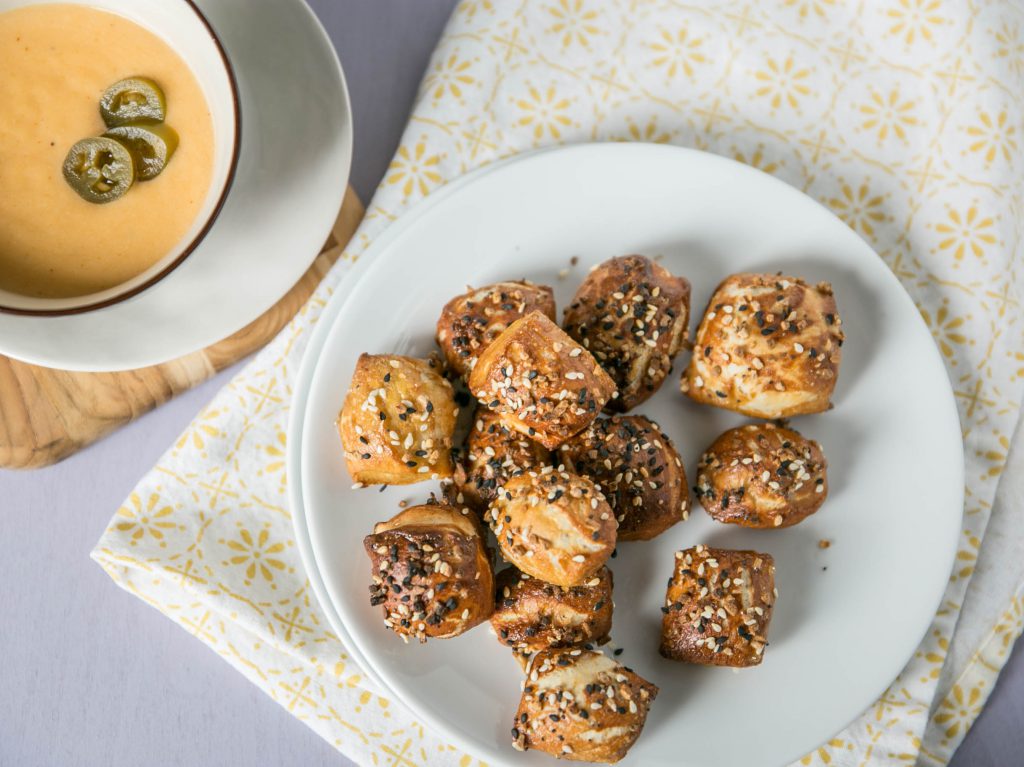
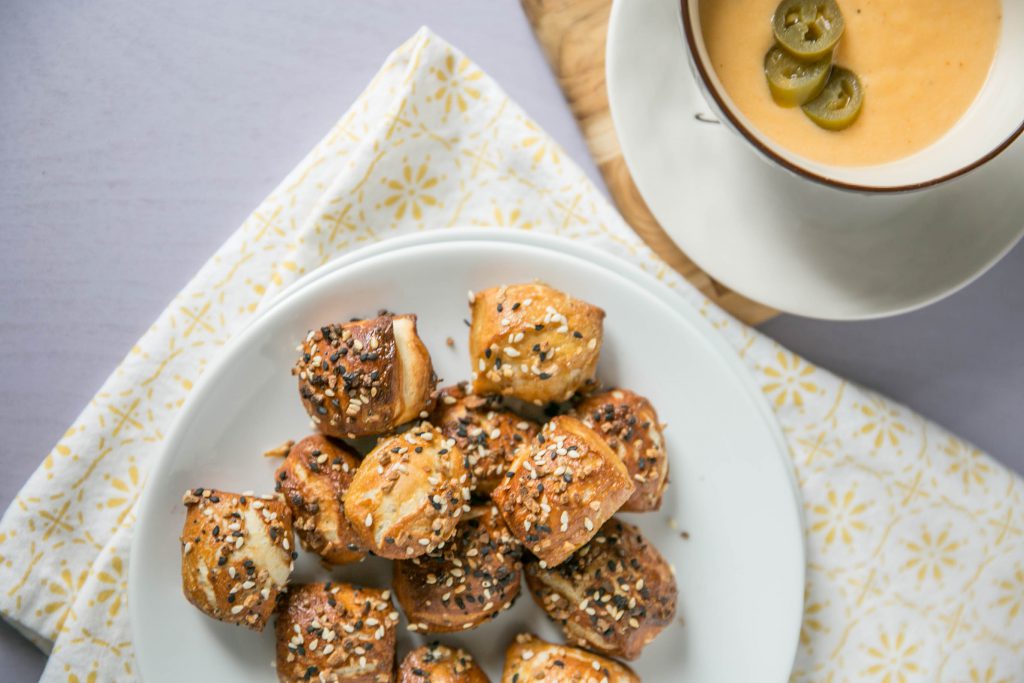
If you aren’t familiar with everything bagels, they are topped with a combination of ­­­poppy seeds, sesame seeds, dried garlic, dried onion, and coarse salt. You can make your own everything seasoning mix or stop by Trader Joe’s and pick up their ‘Everything but the Bagel’ seasoning mix.

Until I discovered the Trader Joe’s seasoning I typically topped by pretzel bites with coarse salt. But, now when I make them I sprinkle them liberally with everything seasoning mix. If you don’t have a Trader Joe’s near you, then here is a quick video that shows how to make your own everything seasoning mix at home.

The pretzel-making process may sound daunting but it really isn’t that bad. Once you set up an assembly line the process isn’t really that bad. I use my stand mixer to make the dough and just knead with my hands a few times at the end before letting the dough rest in an oiled bowl. Then, section the dough and roll each section into a long rope and cut into bite-sized pieces. A quick dunk into a pot of boiling water with baking soda and those babies are ready for the oven.

Everything Pretzel Bites-3

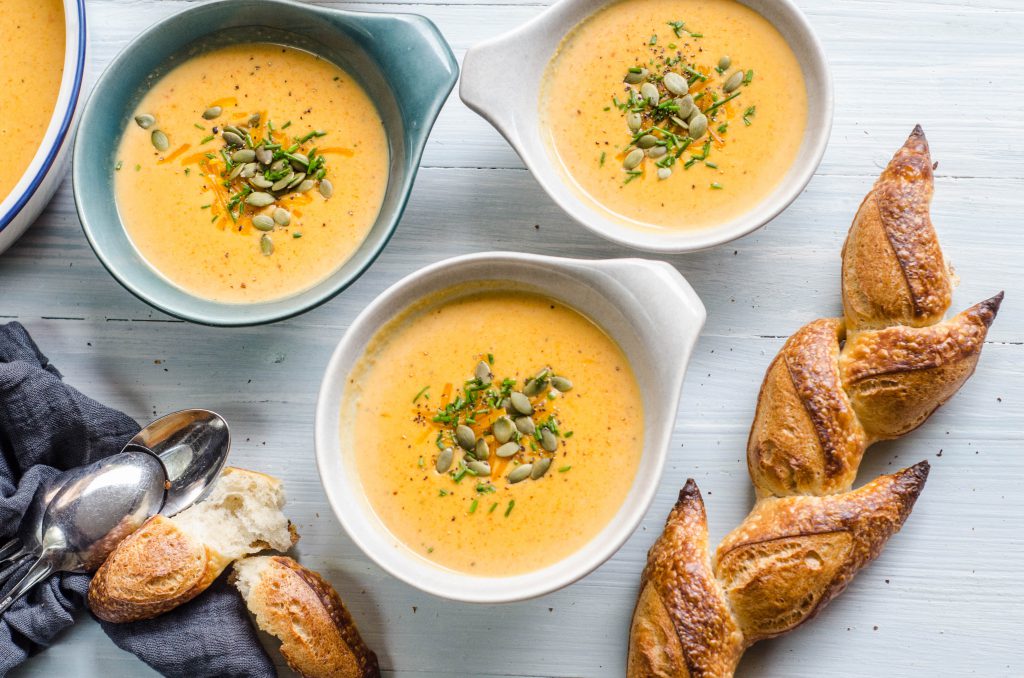
Unless you live in New York City, it isn’t always easy to grab a good soft pretzel as you are wandering around town. That is why I started playing around with making them myself. Everything pretzel bites are a game time staple during football season.

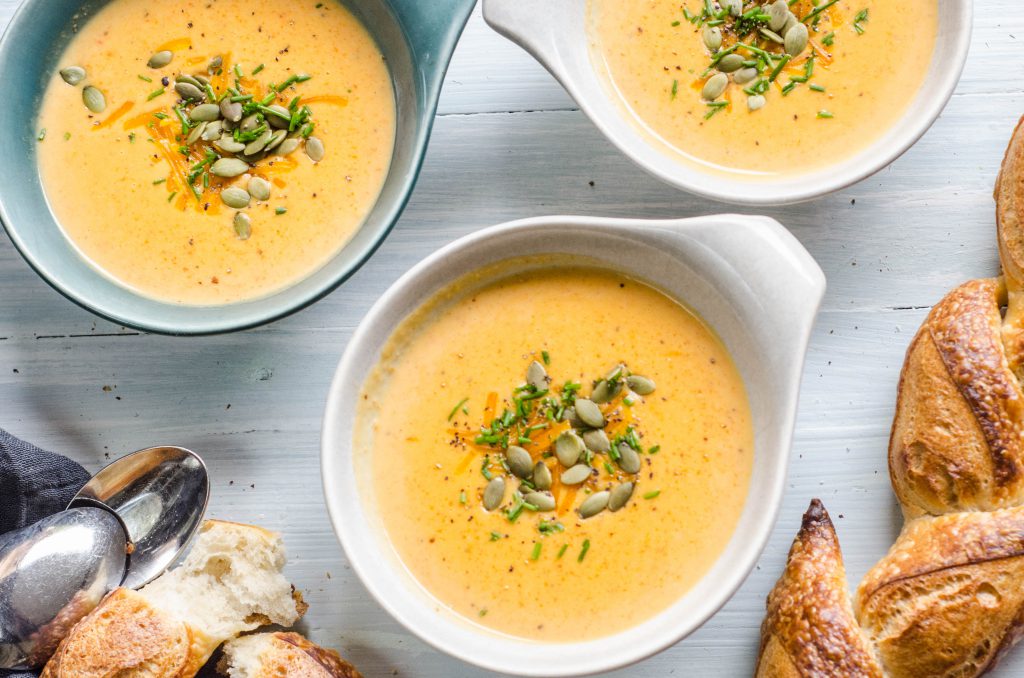
There is something super satisfying about popping one of these pretzels hot from the oven into your mouth with only a quick detour into a pile of mustard or cheese sauce. But, be warned these everything pretzels are pretty addictive. Even if you think you have made enough you may find that they disappear as quickly as you can churn them out.

How to Make Everything Pretzel Bites

Other finger foods you may be interested in are:

Everything Pretzel Bites

Portobello Mushroom Pizzas

Portobello Mushroom Pizzas

I love pizza. Let me be very clear, I could eat pizza every single day of my life. I am not necessarily proud of that fact but it is the truth. For me, there is no greater comfort than warm, melted cheese stretching from the plate to my mouth. Bring it on.

But honestly, sometimes I don’t feel like messing around with dough. I am one messy cook, I get flour everywhere even if I am only rolling out store-bought dough. Enter Portobello mushrooms. They are perfect stand-ins for pizza crust. Mushrooms are hearty and meaty and their cup shape perfectly holds sauce, cheese, and any toppings that you enjoy.

Portobello Mushroom Pizzas

For a quick and easy weeknight dinner use jarred or canned tomato sauce. I use for mozzarella for its ability to melt into stringy gooeyness, provolone for its flavor, sand parmesan for its sharp bite. I like the combination of cheeses but you can skip the provolone and I still think you will be happy with the result.

For the toppings of this Portobello mushroom pizza, I love sun-dried tomatoes and pine nuts with a drizzle of balsamic vinegar, a pinch of crushed red pepper flakes, and ribbons of basil. But, you can swap out these toppings for anything that you prefer.

Portabello Mushroom Pizza-8

I also love olives and onions. Sometimes I use pesto for the sauce instead of marinara sauce. I have a stash of pesto in my freezer from last summer’s bounty. I freeze the pesto in an ice cube trays. Make these your own with your favorite toppings or whatever you have on hand.

The secret to pump up the flavor of the Portobello mushrooms is brush them with a garlic butter mixture before you fill them with sauce and toppings and pop them in the oven. Trust me, it is delicious.

Other mushroom recipes you may be interested in:

Portobello Mushroom Pizza

Parmesan Garlic Clams

Parmesean Garlic Clams overhead shot

I used to feel intimidated by the thought of cooking clams. How do I store them once I get home? What do I need to do to prep them for cooking? It all seemed somewhat overwhelming. But, you know what they say, you should do one thing every day that scares you. I am so glad that one day I decided to face my fear and figure out how to cook clams. Boy, am I glad that I did because these Parmesan Garlic Clams are now part of my repertoire.

Besides fresh clams, the key to this type of preparation is having a flavorful broth to cook the clams in. In order to make Parmesan Garlic Clams, you will use butter, white wine, and broth as the base and shallot and garlic for flavor. A pinch of crushed red pepper flakes add a spicy note. But, a crucial part of this dish is having a crusty baguette available to soak up that delicious broth.

Parmesean Garlic Clams-18

The most important part of the process is getting clams that fresh and have been properly handled. I only buy fresh clams from my fish market or local grocery store whose fish department has a reputation for selling high-quality, fresh fish.

Clams should smell like the ocean and their shells should be closed. Tap any partially opened shells about the counter and if they don’t close then discard them. You want the clams to remain alive prior to cooking them so leave them exposed to the air so that they don’t smother. I usually place the bag in a bowl of ice with the top of the bag left open in the fridge.

Digging for Clams

About an hour or two before you plan to cook the clams remove them from the fridge and give each clam shell a scrub with a kitchen brush. Then, gently place the clams in a large bowl full of water. Let the clams soak in the water for about an hour. They will dispel any sand or grit that is in their shells. Gritty clams are the worst so be sure to do this step. You can read this informative article from Bon Appetit about clams if you want to learn more.

I love to serve Parmesan Garlic Clams with a salad, a crisp white wine, and crusty loaf bread.

Parmesean Garlic Clams-33

How to Make Parmesan Garlic Clams

Other seafood recipes that you may want to check out:

Parmesan Garlic Clams pin


Colcannon

Colcannon-6

St. Patrick’s Day is just over a week away and what better way to celebrate with a traditional Irish dish. Colcannon is mashed potatoes with cabbage or kale. As with many traditional dishes, every family has its own way in which they make it their own. But, the basics include creamy mashed potatoes with softened greens, and scallions or chives. I added garlic to this Colcannon recipe because it is delicious and while I am half Irish, I am also half Italian.

The first consideration is which type of potatoes to use. Colcannon is traditionally made with russet potatoes but I have made it with Yukon gold potatoes too and love the way it turns out. For the greens, you can use cabbage, kale, or Swiss chard. The cabbage maintains more crunch which is a nice contrast to the mashed potatoes. Kale and Swiss chard with soften more but they do share a more vibrant green color which is pretty. My recommendation is to use whichever green you prefer.

Colcannon-4

A few more words about greens. Do you grow your own greens? They are so easy to grow! Now is the time to start planting seeds. I grow greens in raised beds, window boxes, and various sized pots. Some of my favorite greens to grow are arugula (sometimes called rocket), mesclun mix, kale, and Swiss chard.

I adore Baker Creek Heirloom Seeds and pleasure read the catalog all winter long. Visit their website for inspiration. Seriously, can we talk about the gorgeously colored stems on this Swiss chard? In the garden, greens keep on giving all until the summer heat makes them bolt. The good news is that you can replant again in the fall.

Colcannon-1

Colcannon and St. Patrick’s Day

Fun fact: St. Patrick’s Day falls during the Lenten season for Christians but the restrictions on eating and drinking alcohol are lifted which is one of the reasons that the holiday is associated with rowdy behavior. Another thing you may not know about Irish culture is that Colcannon is not only a traditional Irish dish, it is also a song!

This recipe was created in partnership with We Olive. 

If you are are interested in hearing more about Ireland you may want to check these posts:

Colcannon vertical image for Pinterest

Welsh Rarebit

Welsh Rarebit with arugula salad

When I was a kid I thought Welsh rarebit was dish featuring rabbit. I don’t know why, I just did. Did you?  I also thought that the expression ‘making ends meet’ referred to a recipe for dinner. I am embarrassed to tell you that I was well into adulthood before I figured out that Welsh rarebit is another name for fancy cheese toast and cheese toast is something that I can get 100% behind.

My intention for this post to gather some background information about why the recipe is called Welsh rarebit and I started with Wikipedia and surprise!  It sounds like many people thought Welsh rarebit was made with rabbit meat. Perhaps I wasn’t such a dummy when I was a kid.

Welsh rarebit - Wikipedia

But now I know better and I want to make sure that you know about Welsh rarebit and that you try and fall in love with it like I have. I mean toasted bread with cheese sauce ladled over it. C’mon, what is not to love?

Welsh Rarebit-5

I love to use slices of leftover baguette to make Welsh rarebit. If you slice the bread on a diagonal you will get a little more toasty surface to soak up the cheese sauce. I like to melt a little butter to a cast iron skillet and then add the slices of bread. Cook until golden and then flip to toast the other side.

Toasting bread for Welsh rarebit

Remove the toast from the skillet and place on a plate while you make the cheese sauce. Adding beer, Worcestershire sauce, and dry mustard add savory notes to the cheese. I recommend using sharp cheddar for a little extra punch. Adding an egg yolk to the cheese sauce at the very end also makes the sauce rich and silky.

How to Make Welsh Rarebit

I like to serve Welsh rarebit alongside an arugula salad that is lightly dressed with olive oil, a squeeze of fresh lemon juice, sea salt, and fresh cracked pepper. The combo is delicious! 


If Welsh rarebit sounds good, you may also like these recipes:

Welsh rarebit vertical image


Maple Walnut Crostini

Maple Walnut Crostini with Goat Cheese-2Note: This post contains affiliate links*

Crostini are always on my appetizer short-list when I am planning a party. For those that aren’t sure, crostini are an Italian appetizer consisting of toasted bread with toppings. Crostini are great appetizers because you can toast the bread and make the toppings ahead of time. As the holiday season is upon us, I wanted to incorporate some seasonal flavors into the topping. Thus, the Goat Cheese and Maple Walnut Crostini was born!

Let me lay down the process of making these crostini for you. First, you are going to make a batch of maple walnuts. You can do this step a few days in advance of when you want to serve the crostini. To make the maple walnuts, you will combine butter and maple syrup with spices. After adding the walnuts you will stir to coat and the sauce is reduced. You will want to cool the walnuts on a parchment-lined baking sheet. Be careful transferring the walnuts from the pan to the baking sheet. They are hot! I speak from experience.

Maple Walnut Crostini with Goat Cheese-2

The second step is to slice the Chiogga beets very thinly. Chioggas are sometimes called candy cane beets, not because of their flavor but because of their beautiful red and white striped interior. You can peel and slice the beets the day before you plan to serve the crostini. If Chiogga beets are your thing (as they are mine) you may want to check out my Smoked Salmon Beet Bites too.

If you have a mandoline, slicing the beets very thinly is a snap. I love, love, love my mandoline (to be clear, I am talking about a Japanese-style slicing tool not the musical instrument). I use it all the time when I need food sliced very thinly or very evenly or both! The XOX Brand Mandolin is my favorite. It is super affordable, dishwasher-safe, and easy to store. A word of caution: the V-shaped blade in mandolins are very sharp and you should always use the included food holder to protect your fingers from the blade. Again, I learned this the hard way. Twice.

The last do-ahead tip I want to share is to make the crostini up to three days before you want to serve them. I typically buy a baguette for crostini. I like the small size of the bread. It is the perfect bite. Slice your baguette into about 1/2’’ slices. Drizzle the slices of baguette with olive oil and a sprinkle or salt and pepper.

You can either make your crostini on the grill or under the broiler. Whichever way you decide to make your crostini, be sure to keep your eye on them. They can go from just about there to burnt mess in no time at all.

How to Make Goat Cheese and Maple Walnut Crostini

Once you have all your components ready, you just need to assemble the crostini shortly before you want to serve. Place crostini on a platter, place one slice of Chiogga beet on the crostini, top with a dollop or slice of goat and top with a maple walnut. I recommend taking the goat cheese out of the refrigerator an hour before you want to prepare the crostini.

Maple Walnut Crostini pin

Hello Fun Seekers is a participant in the Amazon Services LLC Associates Program, an affiliate advertising program designed to provide a means for sites to earn advertising fees by advertising and linking to amazon.com and affiliated sites.Please note that some links on this blog are affiliate links and I will earn a small commission if you purchase through those links.  It is also important to note that your price remains the same and there is no extra cost to you.  Thank you for your support of Hello Fun Seekers!

Beer Cheese Soup

Beer Cheese Soup-1

You probably know that Wisconsin has the lock on any beer cheese soup recipe. Heck, Wisconsin most likely has the lock on anything to do with beer or cheese in general. But, here I am, offering up my own version of beer cheese soup with a little bit of western flair. Please forgive me Midwesterners, we just want in on some of the beer cheese soup fun.

Beer cheese soup is a fall essential. It is perfect to have on cool autumn weekends whether you have just finished raking leaves, picking apples, or watching football. I make a pot of soup every weekend and enjoy having leftovers for the work week ahead. For me, a bowl of soup is ideal for a quick weeknight dinner or equally awesome to take to work for lunch.

Beer Cheese Soup-5

Sometime during my 30s, my body decided that it no longer could handle milk or cream in any form. So, instead of using half and half to add a creamy element to the soup, I made cashew cream using this recipe. If you are not bothered by cream you can use it instead but I really do love cashew cream.

You can choose your favorite cheddar for beer cheese soup. I typically go with sharp cheddar because I love the flavor but if you or your people prefer a more mild cheddar by all means go with that. I do feel as though having some sort of bread to dip into the soup is essential.

Beer Cheese Soup-7

I was wowed by the photogenic quality of this beautiful baguette but also think soft pretzels would be fantastic to serve with beer cheese soup. I have used this recipe to make soft pretzel bites before and they were delicious and perfect for dipping. But, I am eyeballing this recipe for everything soft pretzel bites. Don’t you think they would be fantastic with beer cheese soup? I love everything that is everything flavored. By the way, have you tried the ‘everything but the bagel’ seasoning at Trader Joe’s? Recommended.

How to Make Beer Cheese Soup

Beer Cheese Soup pin

Mussels with Cider, Shallots, and Bacon

Mussels with Cider, Shallots, and Bacon

If you have a large pot and a few pounds of mussels, you can have a dinner party worthy meal on the tables in no time at all. Mussels are one of the easiest meals to prepare. All you need to do is give the mussels a quick scrub and soak, cook up a few aromatics for a broth to steam the mussels in, and five minutes cooking time. For Mussels with Cider, Shallots and Bacon, I decided to add some autumn flair but using apple cider instead of the more typical white wine as the base of the broth.

The website Serious Eats has a more detailed article on cleaning mussels if you would like a step-by-step guide. I have also included a video below. But, I promise, it is really easy and takes no time at all. Once you get the hang of it, you will be preparing mussels all the time!

While mussels and French fries (frites) are a popular combination in Belgium and France, I prefer to serve mussels with slices of nice bread. My favorites are a beautiful baguette or ciabatta. You will want to use the slices of bread to soak up the delicious broth.

So, let’s walk through the process. Heat a large pot over a medium flame and add oil olive and butter. When the oil and butter start to bubble, add the chopped bacon and cook for a few minutes.  Next you will add the shallots, garlics, and thyme and cook until they are soft. Finally, add the cider and mustard. Bring the broth to a boil before adding the cleaned mussels. The only need a few minutes to cook. Seriously easy, right?

Mussels with Cider Shallots and Bacon-2

If you would like a tasty beverage to accompany your mussels, I recommend either a crisp white wine, sparkling wine (bubbles go with everything), or a Belgian beer.  I love to serve this meal not only because it is delicious but it is a slow-paced meal which encourages conversation as you work your way through the mussels. Slow food at its best!

How to Make Mussels with Cider, Shallots, and Bacon

Mussels with Cider, Shallots, and Bacon Pin

Ricotta Toast with Morel Mushrooms and Asparagus

Ricotta Toast with Asparagus and Morels-4

If you have become a bit tired of avocado toast, you may want to consider swapping out the avocados for ricotta. Don’t get me wrong, no disrespect to avocado toast. I love it, I eat it often, but sometimes I want something a little different. Ricotta is light and airy and perfect with so many different topping.

Ricotta toast is something that I have eaten since I was a kid. Every Italian family keeps ricotta in the fridge. You still get the rich, creamy spread you are used to from avocado toast but a whole new universe of flavors opens up for you. Ricotta can easily be used either in sweet or savory dishes, think lasagna versus cannoli.

In New York, you can find fresh ricotta at many Italian markets. Have you had fresh ricotta? It is so creamy and delicious. I die. Literally. Well, I guess figuratively but still you cannot even at how good it is. I haven’t tried making it at home although I have been told (and this video confirms) that it is really easy to make.

How to Make Fresh Ricotta

I like to use a hearty, rustic bread for the toast. For the toppings on this ricotta toast, I used morel mushrooms which were foraged from the woods near my friend Rachael’s home in Missoula, Montana. I was so excited to get a package from her with bunches of morel mushrooms. What a treat! I made this Pizza with Morel Mushrooms and Green Onions using some of the mushrooms from that same haul.

If Rachael didn’t send you any morels and you couldn’t find them locally, I would swap them out for cremini or button mushrooms. Not quite the panache of morels but still a nice meaty texture to complement the ricotta. I also used some beautiful, medium-sized asparagus chopped into bite-sized pieces to top the Ricotta toast.

Ricotta Toast with Asparagus and Morels-1

Ricotta toast with morel mushrooms and asparagus can really be eaten for any meal. I prefer savory foods in the morning and devoured the toasts on Sunday morning for brunch with coffee. But, served with a green salad or soup, the ricotta toast would also make a perfect light lunch or dinner. Plus, it is so quick and easy to make. Basically, you a few minutes to chop the mushrooms and asparagus, a few minutes to sauté them, and the time it takes to toast the bread. Brilliant when you don’t want to fuss in the kitchen on a weeknight.

Ricotta Toast with Morels and Asparagus


Dutch Baby Pancake

Dutch Baby Pancake

Who likes recipes that involve less than five ingredients, can be blitzed up in a blender, and takes under thirty minutes to bake? *raises hand*

The Dutch baby pancake meets these criteria. You simply put eggs, flour, milk, and seasonings into a blender and pour the batter into a hot skillet which contains melted butter. Let’s talk about Dutch baby pancakes. Have you ever had one?

For the uninitiated, Dutch baby pancakes come out of the oven as light, puffy, golden brown, eggy pancake. Have your cameras ready if you want to Instagram this dish because the puff of the pancake is short-lived. Within minutes, the air comes out of the Dutch baby and it flattens out to a slightly less photogenic but still absolutely delicious dish. The video uses a slightly different recipe but will show  you the process of making a Dutch baby pancake.

How-to Make Dutch Baby Pancakes

Dutch baby pancakes are typically served for breakfast or brunch. I love to eat a Dutch Baby pancake with a squeeze of fresh lemon juice and a sprinkle of powdered sugar. But, served with mixed berries and maple syrup is also delicious. How does lemon curd and strawberries sound to you? Or, wouldn’t sauteed apples and sprinkled with cinnamon and sugar be scrumptious? Let’s face it, any fruit that is in season is a perfect accompaniment to a Dutch baby pancake.

Once you make a Dutch baby pancake, you may find that your imagination runs wild thinking about the possibilities.  Please tell me that your imagination runs wild when you make a delicious recipe. I find myself thinking about what else would taste great on this light and fluffy pancake. What savory toppings can I pair with it to turn this into a savory dinner?

Dutch Baby Pancake

This recipe for a savory Dutch baby pancake from the NY Time includes fresh herbs in the batter and is sprinkled with salty, nutty Parmesan cheese while it bakes. OMG. Yum! I must try that recipe soon. I imagine pairing it with a salad and glass of crisp, white wine.

Enough daydreaming, let me encourage you to try making a Dutch baby pancake this week. You will impress yourself and your people as you take it from the oven in all its glory. I use my 10-inch cast iron skillet to bake the Dutch baby. If you don’t have a cast iron skillet then a similarly sized baking dish will do in a pinch.

Other recipes full of eggy goodness that you might be interested in:

Dutch Baby Pancake

Powered by WordPress & Theme by Anders Norén